
The creation of this tutorial is my own any resemblance to any other tutorial is strictly a coincidence.
Do not copy this tutorial or claim it as your own. If you
would like to share it, please share the link to blog ONLY.
This tutorial was written using Adobe Photoshop CS5 and is
for those with a working knowledge of Photoshop. This tutorial can be adapted
for anyone with a working knowledge of PSP.
Before we start, I would like to remind you to save
frequently. This is in case your program closes on you as mine is known to do. J I save as a .psd file. This keeps your
elements in layers instead of merging everything the way a .png file does. I
also do not say copy and paste your element onto your canvas. In Photoshop, it
is possible to drag and drop. But if you are more comfortable copying and
pasting, then by all means do what is easier for you. I use a white background
while I’m making my tag but I delete it when I am finished.
Supplies needed:
I used Easter Eggspresions by Puddicat Creations scrap kit.
You can find where to buy here
at Mystical Scraps.
I’m using Butterfly from VeryMany. You can get it here.
Mask: I used 2, both by Designs by Vabys. Aquarebel 315
Easter 01, you can find it here.
The mask links are on the left. Remember to say thank you when you download.
Filter: Penta.com: Jeans
Font used is called DiskusDMed. You can use any font you
want though.
Open a canvas 500x500.
Open paper 7. Using DVB Mask 133, create your mask. Place on
your canvas to your liking.
Open paper 13. Using DVB Mask 18, create your other mask.
Place on your canvas to your liking.
Sparkles1: Reduce 29.8%. Place in the top left corner to
your liking. Duplicate and place in the top right corner. Duplicate again and
place this below it, mid canvas or to your liking. Duplicate one last time.
Reduce to 83.7%. Place on the left side of your canvas, below the original, mid
canvas or to your liking.
Bling1: Reduce 77.1%. Place in the middle of your canvas to
your liking. I have mine slightly off the left of the canvas towards the top.
Frame2: Reduce 65.5%. Place in the middle of your canvas
towards the top. Add a drop shadow.
Open your tube. Reduce and place to your liking. I placed
mine to the left of the frame. Add a drop shadow.
If your tube has a close up, take that and place behind the
frame. Enlarge it to your liking. Activate your magic wand. Click inside the
frame.
On your menu click Select>Modify>Expand. Expand
selection by 10 pixels.
Click on Select>Inverse. Now activate your close up. Hit
Delete.
Click on Select>Deselect or cntrl+D on your keyboard.
Go to your filters and apply the penta.com jeans filter
using the default settings. I locked the tube face and frame in case I
accidentally moved it.
The remaining elements go behind the full tube. I deselect
to make it easier you don’t have to.
Fence2: Reduce 63.1%. Place over the bottom of your frame.
Add a drop shadow.
Butterfly2: Reduce 18.0%. Rotate –24.2. Place at the top of
the fence near the right side of your frame. Add a drop shadow.
Butterfly1: Reduce 12.5. Rotate 21.5. Place at top of your fence
on the left side of your frame or to your liking. Add a drop shadow. Duplicate.
Reduce 79.4%. Place on the top right side of your canvas to your liking.
Branch2: Reduce 37.0%. Place on the right side of the fence
to your liking. Add a drop shadow.
Grass1: Reduce 28.7%. Place on the right side of your fence
to your liking. Add a drop shadow. Duplicate twice. Take 1 copy and reduce
91.6%. Place on the left side of your canvas slightly below the fence to your
liking. Duplicate again. Place to the left of the one you just placed.
Flowers4: Reduce 17.2%. Place on the left of your canvas in
front of your fence. Add a drop shadow.
Flowers1: Reduce 18.0%. Place on the left of the fence near
the butterfly. Add a drop shadow. Duplicate and reduce 74.5%. Place on the
right side of your canvas in front of the grass.
Go back to your last copy of Grass1. Duplicate and place at
the bottom of your canvas towards the middle or to your liking.
Flowers5: Reduce 26.8%. Place on the right side of your
canvas near Flowers1. Add a drop shadow.
Make another copy of Flowers4. Place on the left side of
your canvas near the grass, in front of Flowers1 or to your liking.
Ladybug1: Reduce 12.2%. Place on the right side of the fence
to your liking. Add a drop shadow.
Basket1: Reduce 24.6%. Place on the lower left side of your
canvas. Add a drop shadow.
Duplicate the last copy of Grass1. Place in the lower left
corner of your canvas. I have mine slightly off the canvas.
Branch1: Reduce 26.3%. Place in front of the basket to your
liking. Add a drop shadow.
If you deactivated your tube, activate it and place it where
you want it.
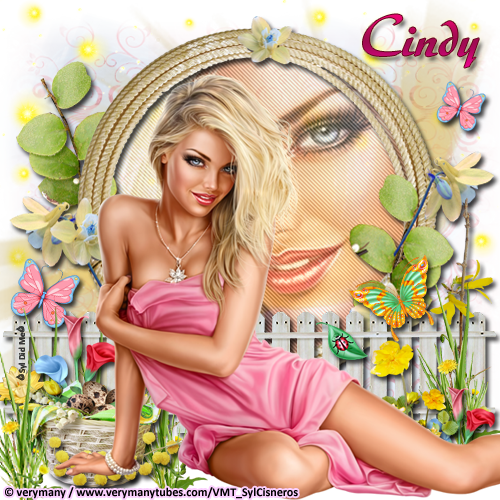
Type the name. The color settings are 000000. Size 60 points. After you type in your name,
go to your blending options.
Check Drop Shadow using the default settings. Opacity is 75%
Check Outer Glow using the default settings.
Check Gradient Overlay:
Blend: Normal
Opacity: 100%
Gradient: Gradient Editor –
Gradient Type Solid.
Smoothness 100%.
Left Stop - EA048B.
Location 0%
Middle Stop - A00B51. Location 51%
Right Stop - EB0672. Location 100%
Style: Linear
Angle: 90
Scale: 100%
When you have entered these settings, click OK.
Check Stroke size 1, color is 64071E. Click okay and place
the name on the top right of your canvas.
Add your license and your watermark making sure they are
legible.
Delete the white background and save as a .png file.
I hope this tutorial was easy to follow. Again, you do not
have to follow this step by step. Add your own touch to it. I would love to see
your results if you do this tutorial.
No comments:
Post a Comment